Web Page
From XnView Wiki
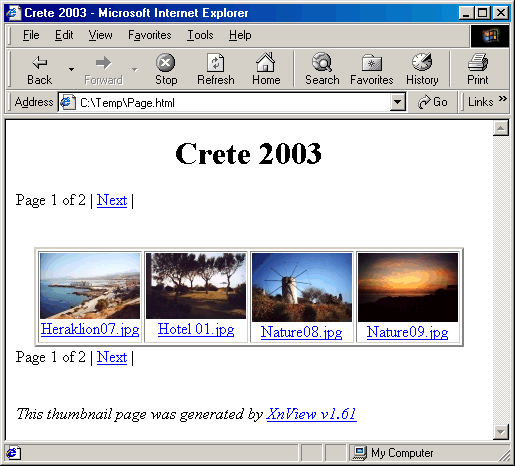
With XnView, you can easily create a web page of your image collections. The created web page will have one or multiple main pages with thumbnails of your images, within the user can navigate. By clicking on a specific thumbnail, the appropriate image is displayed.
Here is a sample Web page:
How To Create a Web page with Images:
- Open the XnView Browser.
- Go to the directory containing the image files.
- Select the images you want to create a Web page from.
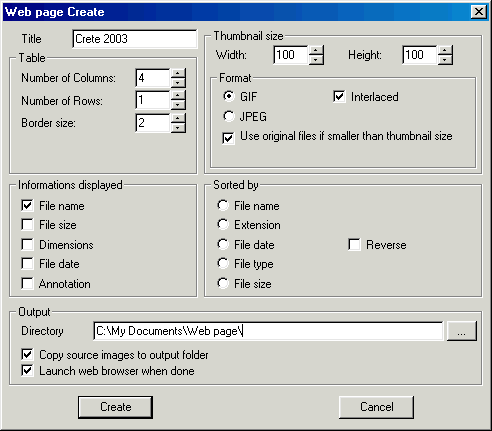
- Choose the Menu Option Tools>Web Page or the applicable symbol from the toolbar. The dialog Web page Create is displayed:
- In the Web page Create dialog, enter the title of the web page in the Title field.
- The thumbnails will be displayed in table form. In the panel "Table" you can define the number of columns or lines of thumbnails per page. In addition, you can define the margin width of the table in pixels.
- In the panel "Thumbnail size" you can change Thumbnail Size as well as the output format of the thumbnails. The original images are always copied 1:1, i.e. without any conversion. If needed, convert the images before creating the web page.
- In the panel Information displayed you define the information displayed, e.g. file name, file size, etc...
- In case you want to sort your images, you can define a Sorted by criteria. This can be file Name, extension type, and many more.
- In the Output panel you define an output directory for the web page(s) and the thumbnails in the Directory field.
- You can decide whether to copy the original files 1:1 to the output directory by checking the Copy source images to output folder check box. Check or uncheck this option if needed.
- You can also choose to automatically display the built web page by selecting the Launch web browser when done.
- Create the web page by pressing the Create.
XnView creates the web page with the images selected by you in the Output directory.


