Difference between revisions of "How to add Face tags"
From XnView Wiki
| (11 intermediate revisions by one other user not shown) | |||
| Line 1: | Line 1: | ||
Starting with XnView MP 0.99.4 x64, | Starting with XnView MP 0.99.4 x64, an add-on for face tagging is available. Use Tools > Plugins menu to install it. | ||
Notes | == Notes == | ||
* XnView's face | * XnView's face tagging can recognize areas with faces. You assign names to the recognized face areas manually. | ||
* XnView does not assign names to faces automatically. | * XnView does not assign names to faces automatically. | ||
* | * The complete process is local; your photos or other data are not uploaded on any online services. | ||
== Step-by-step == | |||
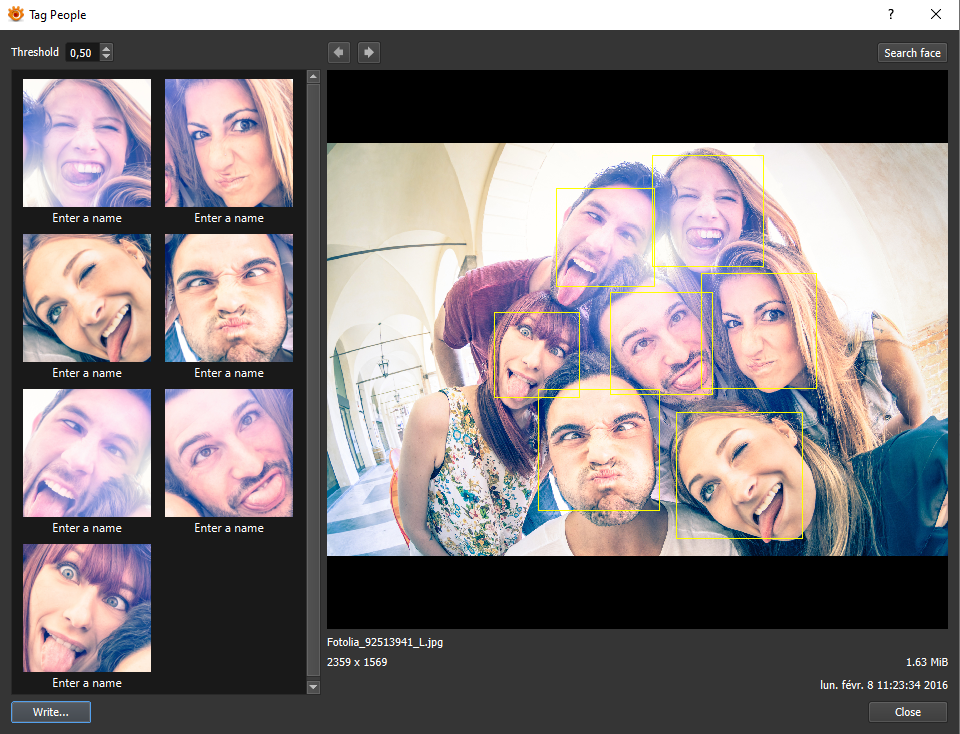
# In XnView Browser, select an image. Then select menu "Tools >> Tag face". If your image file hasn't got already [https://en.wikipedia.org/wiki/Extensible_Metadata_Platform XMP] MWG metadata, XnView will start and recognize areas with faces.<br />[[File:Face-Plugin-1.png]]<br /><br /> | |||
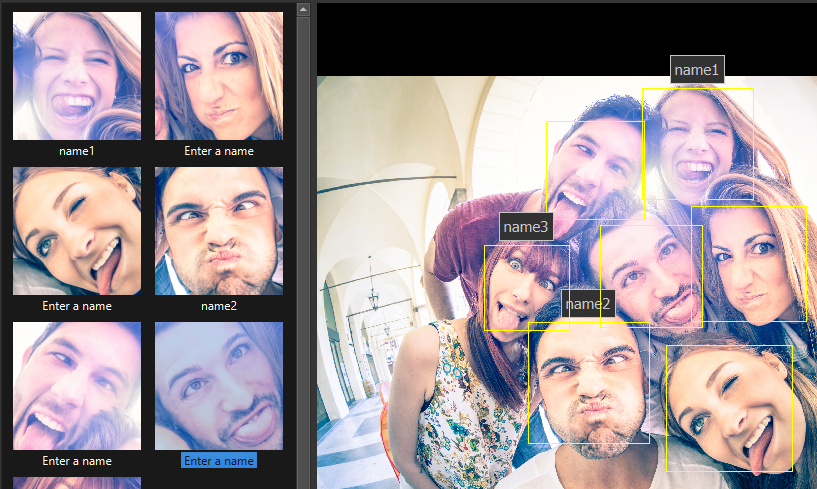
[[File:Face-Plugin-1.png]] | # On the left, you can see all face areas recognized by XnView. Now you can enter a name for each face by double-clicking on a face or by selecting a face and pressing "F2" key.<br />[[File:Face-Plugin-2.png]]<br /><br /> | ||
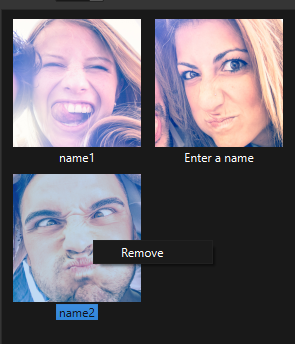
# You can remove a face area by right clicking and then selecting "Remove". If you removed a face area by accident, you can use "Search face". Please note that you will start from scratch, then.<br />[[File:Face-Plugin-3.png]]<br /><br /> | |||
# When you assigned names to all face areas, please choose "Write.." to save face areas and names. The face areas (regions) will be written in the MWG section of XMP's metadata. | |||
On the left | # Use "Previous file/Next file" buttons [[File:Face-Plugin-4.png]] to process another image or "Close" button to exit face tagging. | ||
[[File:Face-Plugin-2.png]] | |||
You can | |||
[[File:Face-Plugin-3.png]] | |||
When | |||
[[File:Face-Plugin-4.png]] | |||
Latest revision as of 09:37, 11 January 2024
Starting with XnView MP 0.99.4 x64, an add-on for face tagging is available. Use Tools > Plugins menu to install it.
Notes
- XnView's face tagging can recognize areas with faces. You assign names to the recognized face areas manually.
- XnView does not assign names to faces automatically.
- The complete process is local; your photos or other data are not uploaded on any online services.
Step-by-step
- In XnView Browser, select an image. Then select menu "Tools >> Tag face". If your image file hasn't got already XMP MWG metadata, XnView will start and recognize areas with faces.
- On the left, you can see all face areas recognized by XnView. Now you can enter a name for each face by double-clicking on a face or by selecting a face and pressing "F2" key.
- You can remove a face area by right clicking and then selecting "Remove". If you removed a face area by accident, you can use "Search face". Please note that you will start from scratch, then.
- When you assigned names to all face areas, please choose "Write.." to save face areas and names. The face areas (regions) will be written in the MWG section of XMP's metadata.
- Use "Previous file/Next file" buttons
 to process another image or "Close" button to exit face tagging.


